How to Install Kali Linux on USB Flash Drive in 2024
Introduction to Kali Linux
Kali Linux is a powerful open-source operating system specifically designed for penetration testing and digital forensics. It provides a wide range of tools and resources for ethical hackers and security professionals to assess the security of computer systems. With its advanced features and extensive collection of software, Kali Linux has become a popular choice among cybersecurity enthusiasts.
| Also Read: What Is The Best WiFi Hacking Tool In Kali Linux? How I Hacked My Own WiFi In Less Than 1 Minute?
Running Kali Linux from a USB Flash Drive
If you’re new to Kali Linux or simply want to try it out without installing it on your computer or laptop, you can easily run it directly from a USB flash drive. This allows you to carry Kali Linux with you wherever you go and use it on any compatible system without making any changes to the host operating system.
Benefits of Installing Kali Linux on a Flash Drive
There are several advantages to installing Kali Linux on a USB flash drive:
- Portability: With Kali Linux on a flash drive, you can have your own portable hacking station. You can carry it in your pocket and use it on any computer without leaving any traces behind. This is particularly useful for security professionals who need to perform penetration testing on different systems.
- No Installation Required: Running Kali Linux from a USB flash drive means you don’t need to install it on your computer. This saves you from the hassle of partitioning your hard drive or dual-booting with another operating system. You can simply plug in the flash drive and boot into Kali Linux whenever you need it.
- Independent of Host Operating System: By booting Kali Linux from a flash drive, you can use it on any computer regardless of the operating system it runs. Whether you’re using Windows, macOS, or any other operating system, you can seamlessly switch to Kali Linux without any interruptions.
- Data Privacy: Since Kali Linux runs from a separate flash drive, you don’t have to worry about your activities or data being stored on the host system. This provides an additional layer of privacy and security, ensuring that your sensitive information remains protected.
- Cost-Effective Solution: Installing Kali Linux on a flash drive is a cost-effective solution compared to setting up a dedicated physical or virtual machine. It eliminates the need for additional hardware or virtualization software, making it an economical choice for security professionals and enthusiasts alike.
- Hardware Compatibility: Kali Linux on a flash drive offers greater hardware compatibility compared to a fixed installation on a specific computer. This flexibility allows you to work on a variety of machines without worrying about hardware compatibility issues or driver conflicts.
- Legacy System Support: Running Kali Linux from a flash drive enables you to extend the lifespan of older or legacy systems that may not meet the requirements for a full installation. This allows you to repurpose older hardware for cybersecurity tasks without investing in costly upgrades.
- Temporary Deployment: Installing Kali Linux on a flash drive facilitates temporary deployments for short-term projects or engagements. You can quickly set up a secure testing environment on any compatible system and remove it once the project is completed, avoiding the need for permanent modifications.
- Secure Workstations: Kali Linux on a flash drive provides a secure and isolated workstation environment for handling sensitive information or performing confidential tasks. This ensures that your activities remain segregated from the host system, reducing the risk of data breaches or unauthorized access.
| Also Read: Top 10 Free AI Tools To Remove Image Background Online In 2024.
Steps to Install Kali Linux on a USB Flash Drive
These are the steps to make a bootable Kali Linux USB Flash Drive:
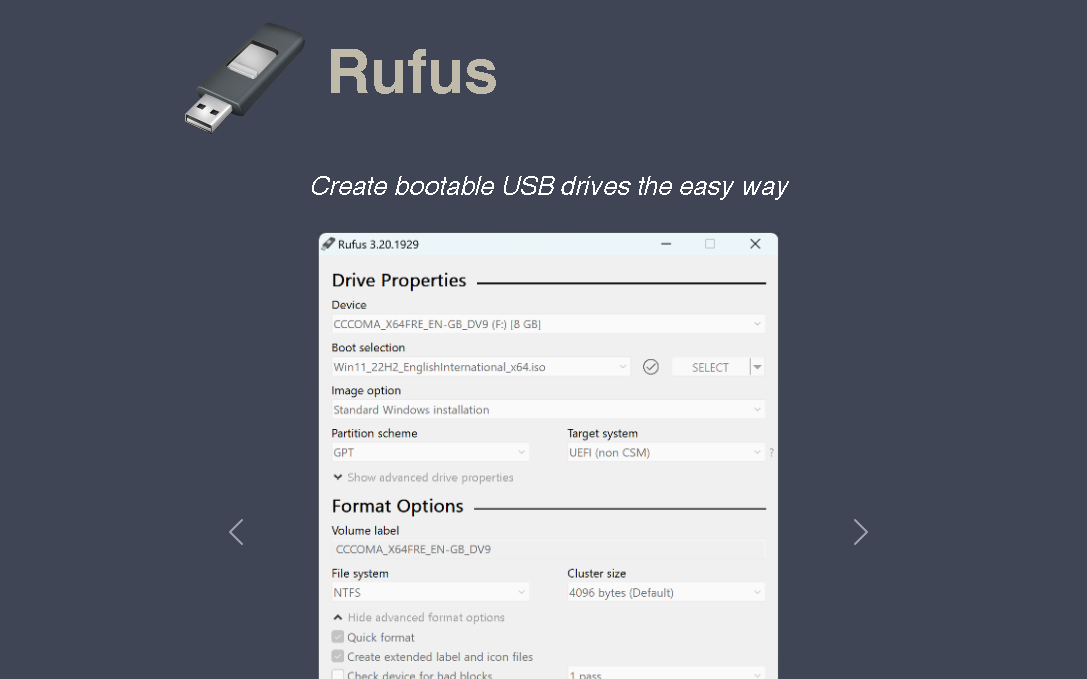
- Download and Install Rufus: Start by downloading Rufus, a popular tool for creating bootable USB drives. Rufus is a utility for formatting and creating bootable USB drives from ISOs, useful for installing operating systems, working on systems without an OS, flashing BIOS/firmware, and running low-level utilities. Click here to download this tool. It will open Rufus’ official website.
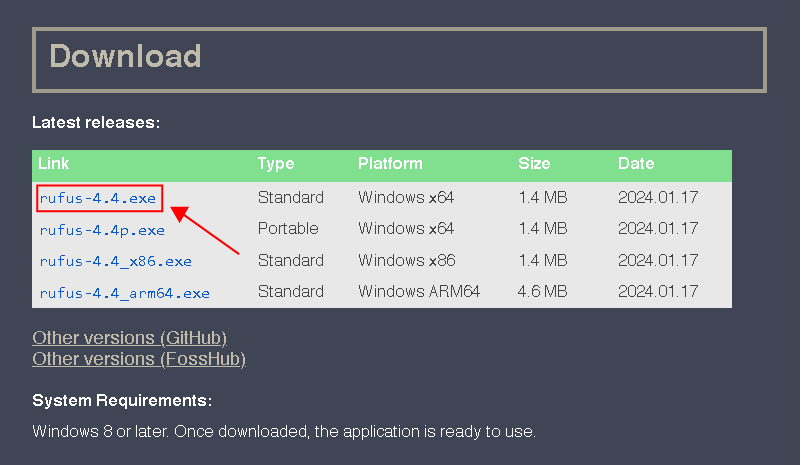
Scroll down and click on the first link in the latest releases, only if your system is 64-bit. If your system is 32-bit you can download the portable version by clicking on the second link where the type is specified as portable. Portable versions can be run on both 32 and 64-bit operating systems.
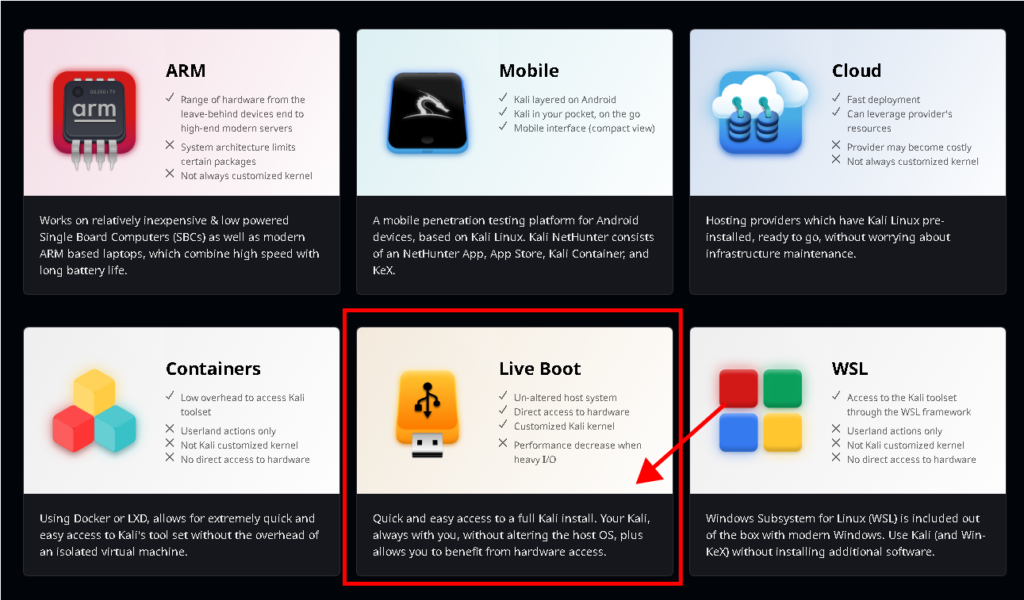
- Download the Kali Linux Live Setup: Click here to visit the official Kali Linux website download page. It will show various options but we need to Scroll Down and Click on Live Boot since we are going to install it in USB Flash Drive.
- Insert the USB Flash Drive: Insert an 8GB or larger USB flash drive into your computer. I am using a 64 GB flash drive. Keep in mind that all data on the flash drive will be erased during the installation process, so make sure to back up any important files.
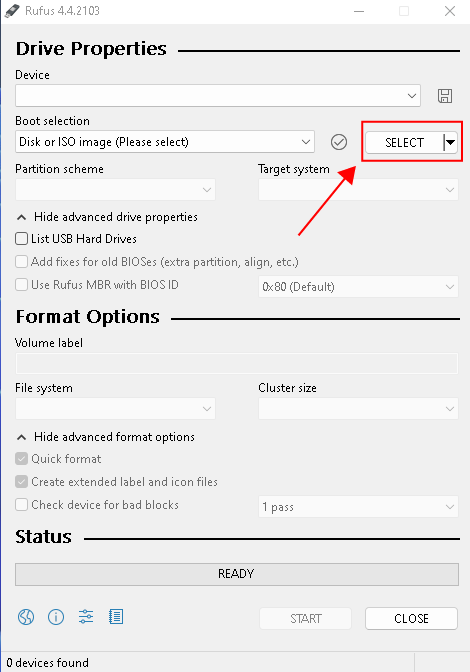
- Launch Rufus: Open the Rufus setup you have just downloaded, possibly in your download folder/directory.
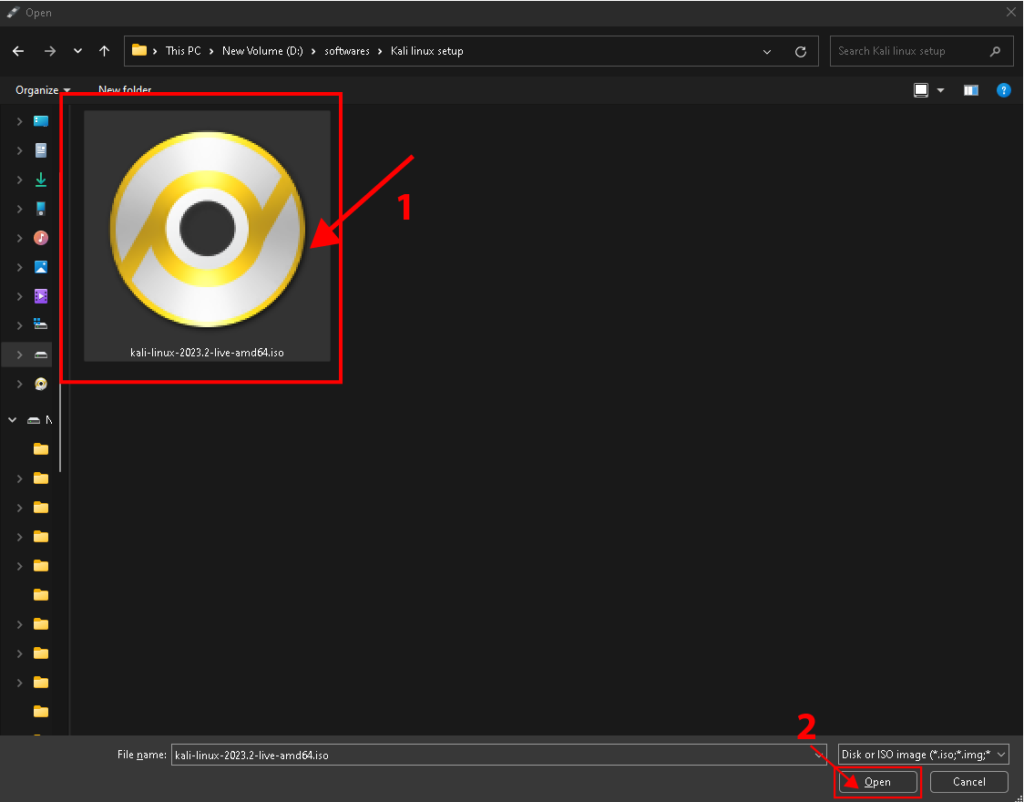
- Select the Kali Linux ISO Image: Click on the “Select” button next to the “Boot selection” option and navigate to the location where you saved the Kali Linux Live ISO image, it might be in your download folder but I have saved it in a different location. Select the ISO file and click “Open.”
- Configure Rufus Settings: Leave the default settings unless you have specific requirements. Ensure that the partition scheme is set to “MBR” and the file system is set to “FAT32.” Persistent means the storage Kali Linux takes on your flash drive to save data like ROM or storage. If you don’t want to install scripts, download software, or any data every time you boot from your Flash drive, you should specify the persistent partition size. I am going with 10 GB, you can set it to your requirements. However, the greater the persistent partition size is, boot time will be increased, so hold patiently. You can also change your Flash Drive label or name, or your default label will be Kali Live after the boot process.
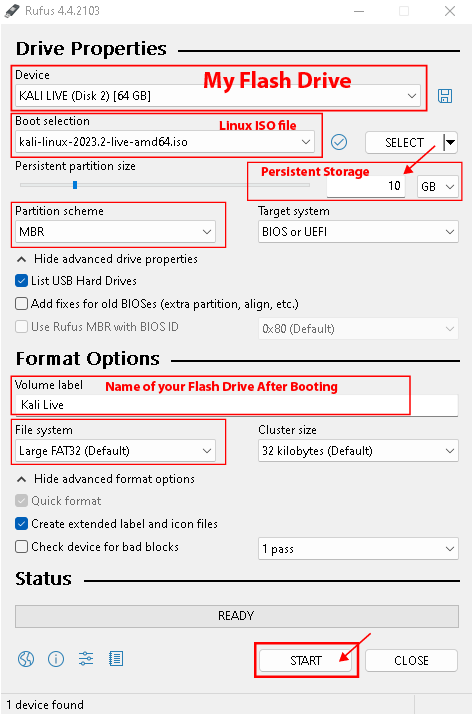
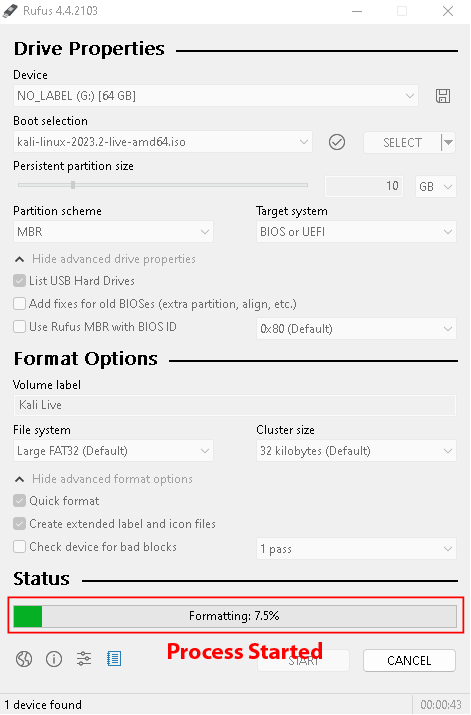
- Create the Bootable USB Drive: We have inserted our flash drive and agreed to remove all the data on it and Selected our Kali Linux ISO file. Now Click on the “Start” button to begin creating the bootable USB drive. It will warn regarding the formation of your data, Click “OK“. Rufus will format the flash drive and copy the Kali Linux Live setup files onto it. Hold on tightly!
- Booting from the USB Flash Drive: Once Rufus completes the process, Click on “CLOSE” and safely eject the USB flash drive from your computer.
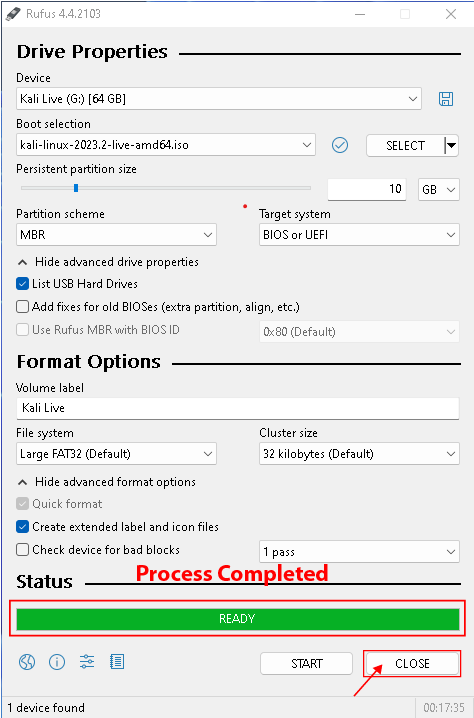
Note: Don’t click on “START” by mistake or the process of booting will start again.
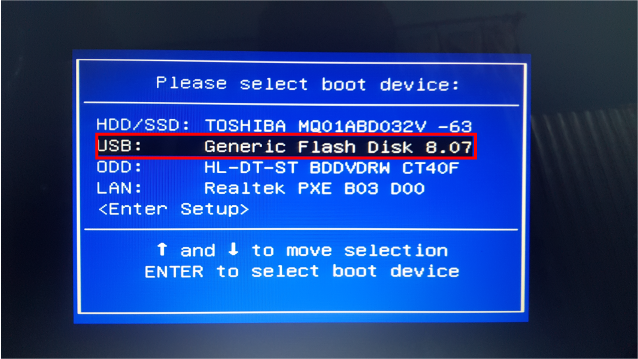
- Run Kali Linux: Turn off your system. Insert the flash drive into the USB port and press the power button to turn on your system. When you press the power button it will display a key name in the start, which you can press to get into the boot menu. In general, the boot key in Del, Toshiba, and Acer laptops or computers is “F12”, “F8” in Asus, and the “option” key in Apple. Each Company’s laptops or systems have different boot menus. I am on Toshiba Laptop. Use the Upper and Lower buttons to select USB or Generic Flash Disk and hit “Enter“.
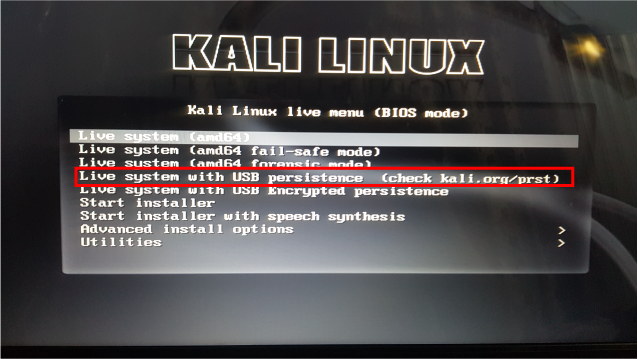
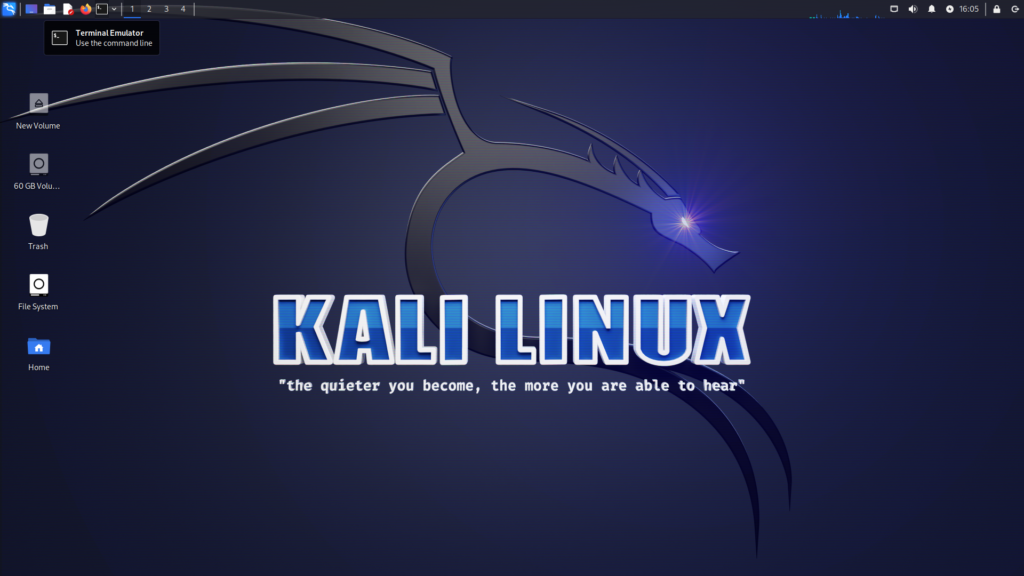
Kali Linux is started. Every time you boot Kali Linux from your Flash Drive, Select Live system with USB persistence so you can enjoy Kali Linux with storage and never lose the data or changes you make.
Conclusion
Installing Kali Linux on a USB flash drive allows you to have a portable and independent hacking environment. By following the steps outlined above, you can create a bootable Kali Linux USB drive using Rufus and enjoy the benefits of this powerful operating system on any compatible computer. Remember to exercise caution while using Kali Linux and always adhere to ethical hacking practices.
If you want to learn how to hack WiFi easily with no code in Kali Linux, then read this article, What Is The Best WiFi Hacking Tool In Kali Linux? How I Hacked My Own WiFi In Less Than 1 Minute?